Magischer Schlüssel
Für The Legend of Zelda auf dem Nintendo Entertainment System (NES).
Aus der Anleitung
Öffnet eine verschlossene Tür in einem Labyrinth. Ein Schlüssel ist nach einmaligem Gebrauch weg, der Magische Schlüssel aber wirkt beliebig oft.
Aus der japanischen Anleitung übersetzt.
Gegenstand

| Art | Gegenstände |
|---|---|
| Englischer Name | Magical Key |
| Japanischer Name | マジカルキー |
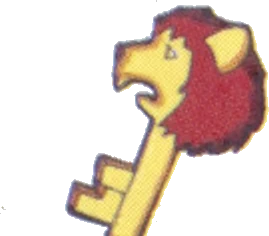
Offizielles Artwork
Aus den offiziellen Büchern
Needed to open locked doors in the labyrinths. The Magical Key in particular is a handy key that can be used any number of times. While Link has it, the counter shows A (almighty).
Needed to open locked doors in the labyrinths. The Magical Key in particular can be used any number of times. While Link has it, the counter shows A (almighty).
Link needs these to open the locked doors in the labyrinths. The magical key is very useful. Link can use it over and over again. Once he's got this magical key, "A" will be displayed showing that he's unstoppable!
You must have keys to open doors in the mazes. The regular key can be used only once but the magical key can be used as many times as you want. If you obtain the magical key, the number indication turns to "A" (Almighty).
A key shaped like a lion's head. It opens every door with a keyhole. It is in Level 8.
An all-purpose key with a lion's face on it. No matter how many locked doors there are, no problem! The Lion Key is hidden in the Lion labyrinth (Level 8).
Opens every door. The key display changes to "A" too.
Used to open doors in the labyrinths. The Magical Key can be used any number of times.
It opens locked doors (what else would it be for!). A normal Key is used up, but the Magical Key lasts forever. Handy!
An ordinary key can be used only once, but this Magical Key can be used as many times as you like. Very handy.
An all-purpose key called the Lion Key. It can be used any number of times, so once you have it, you don't need normal keys anymore.
You need them to open locked doors in the labyrinths. With the Magical Key, the counter shows A (almighty) and you can use it any number of times, which is very handy.
It is hidden underground in Level 8. With it you can open locked doors as many times as you like. Handy, since you don't have to look for keys.
A normal Key can only be used once, but the Magical Key works as many times as you like. Once you have the Magical Key, the key count shows A (almighty).
Labyrinthe
Erste Quest
Zweite Quest
Rot: der Raum mit dem Gegenstand. Grün: der Eingang.
Wofür es gut ist
Er öffnet jede verschlossene Tür, Link braucht keine Schlüssel mehr. Diese Räume haben verschlossene Türen.
Erste Quest
Level 9
- Raum 1
- Raum 2
- Raum 6
- Raum 18
- Raum 19
- Raum 20
- Raum 21
- Raum 22
- Raum 34
- Raum 35
- Raum 37
- Raum 38
- Raum 48
- Raum 51
- Raum 54
- Raum 64
- Raum 80
- Raum 83
- Raum 98
- Raum 99
- Raum 115
- Raum 116
Zweite Quest
Rot: der Raum mit dem Gegenstand. Grün: der Eingang.