Level 1, Second Quest
For The Legend of Zelda on the Nintendo Entertainment System (NES).
Labyrinth
| Quest | Second Quest |
|---|---|
| Rooms | 14 rooms |
| Keys | 2 |
| Bosses | Dodongo, Aquamentus, Moldorm |
From the official guides
This is a small, simple labyrinth, consisting of 14 rooms in total with one secret passage. However, since the enemies have become a lot stronger than before, you had better obtain the Magic Shield before you enter.
However hard the second quest is, Level 1 is not much. The boss guarding the Triforce piece is Aquamentus, which hardly seems a strong enemy, and the labyrinth is not very complicated either; if anything it is on the simple side. At Level 1 you want to clear it as a quick test of skill.
Map
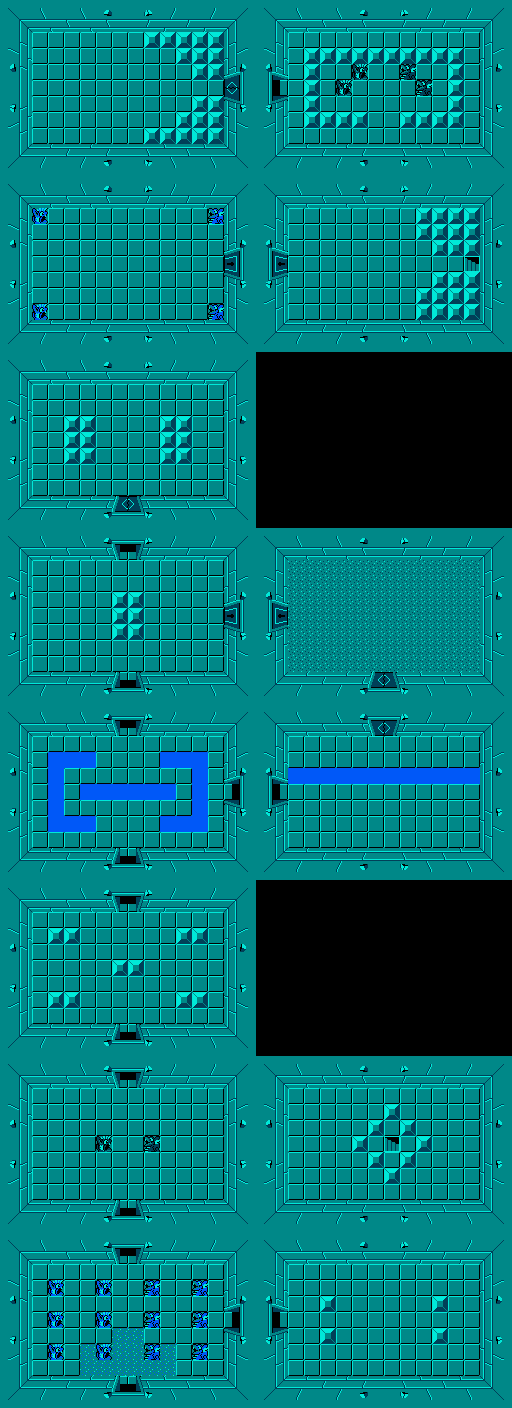 782324395556717287103104119120


Rooms are drawn as the game builds them, with their numbers on the game's 16 by 8 room sheet. Each item sits on the room it is in; an item down a stairway sits on the room the stairs are in. The entrance has a green frame.
Items
- Heart ContainerRoom 7: Shows up once every enemy in the room is beaten
- TriforceRoom 8: Lies in the room
- KeyRoom 24: Shows up once every enemy in the room is beaten
- 5 RupeesRoom 55: Shows up once every enemy in the room is beaten
- BombsRoom 71: Shows up once every enemy in the room is beaten
- MapRoom 72: Beat every enemy in the room
- CompassRoom 87: Shows up once every enemy in the room is beaten
- KeyRoom 103: Shows up once every enemy in the room is beaten
- BoomerangRoom 120: Shows up once every enemy in the room is beaten
Stairways
- Room 24 to Room 104
A stairway room is a side view passage under the labyrinth. Climbing out on the left leads to the first room, on the right to the second.
Enemies
 Blue Goriya6 in 2 rooms
 Red Goriya8 in 2 rooms
 Gel8 in 1 room
 Blue Keese10 in 2 rooms
 Wallmaster5 in 1 room
 Stalfos5 in 1 room
 Bubble3 in 1 room
Bosses
 Dodongo1 in 1 room
 Aquamentus1 in 1 room
 Moldorm1 in 1 room