Bubble
For The Legend of Zelda on the Nintendo Entertainment System (NES).
From the manual
A will-o'-the-wisp. Once it touches you, you can't use your sword for a while.
Translated from the Japanese manual.
Enemy

| Kind | Enemy |
|---|---|
| Japanese name | バブル |
Official art
From the official guides
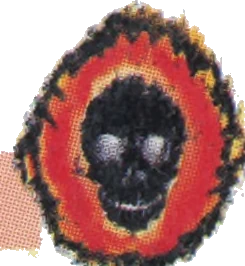
A ghost flame. If one latches onto Link, he cannot draw his sword for a while.
A ghost flame. If one latches onto Link, he cannot draw his sword for a while.
The spirit of the dead. When it clings onto Link, he won't be able to unsheath his sword for a while.
"Will-o'-the-Wisps". If a Bubble attacks you, you won't sustain damage, however, you won't be able to use your sword for a few moments. If this happens while you are fighting with other enemies, the fight will be very tough for you. Watch out!
Touching it will not cost you life, but you go numb and cannot draw your sword for a while. When Bubbles are with other enemies, fight mainly with your B button weapons.
It is a will-o'-the-wisp, so attacking it does nothing. Be careful, because touching it stops you from using your sword for a while. You do not take damage, though.
A will-o'-the-wisp that wanders the labyrinths. Touch it and the shock knocks you back, and for a while you cannot draw your sword. You do not lose any energy, though.
A ghost flame. Touch it and you can't move. It can't be attacked with the sword.
To use a well-known name, a "will-o'-the-wisp." In other words, a ghost flame that drifts around the room fast and at random. If Link touches it, it possesses him and he can't draw his sword for a while. I think there was a room where this one, Wizzrobes, and Like Likes attack together. That one is pure hell!
A will-o'-the-wisp that drifts around the underground labyrinths. Be careful: if a Bubble touches you, you can't draw your sword for a while. It also can't be defeated, so when one appears, all you can do is run.
A will-o'-the-wisp that races all over the room in straight lines. If it catches you, you can't use your sword for a while.
A kind of will-o'-the-wisp. If one gets you, you can't draw your sword for a while, and in the meantime you have to dodge attacks from all kinds of enemies. It moves fast too, so be careful.
A huge will-o'-the-wisp. If it gets you, you take no damage, but you can't use your sword for a while. It can't be beaten, so keep running.
A will-o'-the-wisp. When one gets hold of Link he takes no damage, but for a while afterward he cannot draw his sword.
Numbers
Hits to beat it
Hits don't wear it down.
Hearts lost per touch
Touching it costs no hearts.
Drops
Drops something 104 times in 256 (40.6%). What it drops comes from these 10 slots in turn:


Where it appears
Labyrinths, First Quest
Level 6
- Room 10: 2 at once
- Room 25: 2 at once
- Room 27: 1 at once
- Room 29: 2 at once
- Room 45: 2 at once
- Room 56: 1 at once
- Room 58: 1 at once
Level 9
- Room 1: 3 at once
- Room 3: 2 at once
- Room 7: 3 at once
- Room 16: 3 at once
- Room 19: 2 at once
- Room 23: 1 at once
- Room 34: 2 at once
- Room 37: 2 at once
- Room 49: 1 at once
- Room 54: 3 at once
- Room 69: 1 at once
- Room 71: 3 at once
- Room 83: 1 at once
- Room 86: 2 at once
- Room 100: 1 at once
- Room 101: 3 at once
- Room 115: 3 at once
Labyrinths, Second Quest
Level 9
- Room 16: 2 at once
- Room 17: 3 at once
- Room 35: 1 at once
- Room 54: 2 at once
- Room 71: 2 at once
- Room 82: 3 at once
- Room 102: 1 at once
Red: rooms it is in. Green: the entrance.