Chiave magica
Per The Legend of Zelda su Nintendo Entertainment System (NES).
Dal manuale
Apre una porta chiusa a chiave in un labirinto. Una chiave sparisce dopo l'uso, ma la Chiave magica funziona tutte le volte che vuoi.
Tradotto dal manuale giapponese.
Oggetto

| Tipo | Strumenti |
|---|---|
| Nome inglese | Magical Key |
| Nome giapponese | マジカルキー |
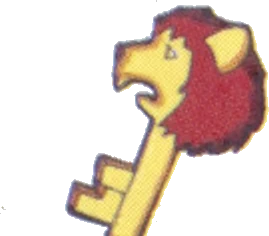
Illustrazione ufficiale
Dalle guide ufficiali
Needed to open locked doors in the labyrinths. The Magical Key in particular is a handy key that can be used any number of times. While Link has it, the counter shows A (almighty).
Needed to open locked doors in the labyrinths. The Magical Key in particular can be used any number of times. While Link has it, the counter shows A (almighty).
Link needs these to open the locked doors in the labyrinths. The magical key is very useful. Link can use it over and over again. Once he's got this magical key, "A" will be displayed showing that he's unstoppable!
You must have keys to open doors in the mazes. The regular key can be used only once but the magical key can be used as many times as you want. If you obtain the magical key, the number indication turns to "A" (Almighty).
A key shaped like a lion's head. It opens every door with a keyhole. It is in Level 8.
An all-purpose key with a lion's face on it. No matter how many locked doors there are, no problem! The Lion Key is hidden in the Lion labyrinth (Level 8).
Opens every door. The key display changes to "A" too.
Used to open doors in the labyrinths. The Magical Key can be used any number of times.
It opens locked doors (what else would it be for!). A normal Key is used up, but the Magical Key lasts forever. Handy!
An ordinary key can be used only once, but this Magical Key can be used as many times as you like. Very handy.
An all-purpose key called the Lion Key. It can be used any number of times, so once you have it, you don't need normal keys anymore.
You need them to open locked doors in the labyrinths. With the Magical Key, the counter shows A (almighty) and you can use it any number of times, which is very handy.
It is hidden underground in Level 8. With it you can open locked doors as many times as you like. Handy, since you don't have to look for keys.
A normal Key can only be used once, but the Magical Key works as many times as you like. Once you have the Magical Key, the key count shows A (almighty).
Labirinti
Prima missione
Seconda missione
Rosso: la stanza dell'oggetto. Verde: l'ingresso.
A cosa serve
Apre tutte le porte chiuse, così Link non consuma più chiavi. Queste stanze hanno porte chiuse.
Prima missione
Livello 1
- Stanza 34
- Stanza 35
- Stanza 51
- Stanza 53
- Stanza 66
- Stanza 67
- Stanza 68
- Stanza 69
- Stanza 82
- Stanza 99
- Stanza 115
Livello 5
- Stanza 5
- Stanza 6
- Stanza 22
- Stanza 36
- Stanza 37
- Stanza 38
- Stanza 39
- Stanza 70
- Stanza 86
- Stanza 102
- Stanza 103
Livello 9
- Stanza 1
- Stanza 2
- Stanza 6
- Stanza 18
- Stanza 19
- Stanza 20
- Stanza 21
- Stanza 22
- Stanza 34
- Stanza 35
- Stanza 37
- Stanza 38
- Stanza 48
- Stanza 51
- Stanza 54
- Stanza 64
- Stanza 80
- Stanza 83
- Stanza 98
- Stanza 99
- Stanza 115
- Stanza 116
Seconda missione
Livello 7
- Stanza 11
- Stanza 12
- Stanza 40
- Stanza 56
- Stanza 61
- Stanza 72
- Stanza 73
- Stanza 77
- Stanza 105
- Stanza 106
Rosso: la stanza dell'oggetto. Verde: l'ingresso.