Twilight Princess Walkthrough
The story from start to finish, one stage at a time, with the items Link gets along the way and how each boss goes down. Directions are for the GameCube. Pieces of Heart, Poe Souls, and Golden Bugs are on the collectibles page, and the side games on the quests page.
Ordon to the Goron Mines
From the last quiet days in Ordon Village to the second Fused Shadow.
Ordon Village opening days
Ordona Province
- Link wakes in his house above the village and spends the first days on chores for his neighbours.
- Herd the goats into the barn for Fado, and use the hawk to drive off the monkey that took Uli's cradle.
- Return the cradle to Uli, and she gives Link a Fishing Rod.
- Buy the Slingshot for 30 Rupees at Sera's shop.
- Link gets the Wooden Sword and shows the village children some sword moves.
- Ilia takes Epona to Ordon Spring, and Link follows her there.
 Fishing Rod
 Slingshot
 Wooden Sword
The Legend of Zelda: Twilight Princess HD, Prima Official Digital Strategy Guide, pages 9 to 14; The Legend of Zelda: Twilight Princess, Nintendo Player's Guide, pages 30 to 32.
Faron Woods prologue
Faron Province
- Talo runs after a monkey into Faron Woods, and Link goes after him with the Wooden Sword.
- Coro, at his hut by the woods, gives Link the Lantern and sells Lantern Oil.
- Light the Lantern in the dark stretches and clear the Baba plants and Bokoblins along the trail.
- Take the Small Key from the chest by the two torches to open the gate to the next part of the woods, then beat the Bokoblins and free Talo from his cage.
- The next day Bulblins ride into Ordon Spring and carry off Ilia and the children. Link follows them to a wall of twilight, and a shadow beast drags him through.
- Link wakes in a cell in the shape of a wolf.
Items:
 Lantern
The Legend of Zelda: Twilight Princess HD, Prima Official Digital Strategy Guide, pages 15 to 17; The Legend of Zelda: Twilight Princess, Nintendo Player's Guide, pages 33 to 35.
Castle sewers, tower, and Zelda
Hyrule Castle
- Dig under the bent bars of the cell, then bite the chain in the next cell so a gate opens onto the sewer channel.
- Midna rides on Link's back and asks for chains to be pulled, which open conduits and raise a dam wall so the sewer fills with water.
- Swim north through the flooded channel and crawl under the fence to reach Midna.
- Climb the tower stairs, using Midna at the target prompt to jump the broken gaps.
- Cross the battlements to Zelda's tower, where the princess explains the twilight and Midna agrees to her plan.
The Legend of Zelda: Twilight Princess HD, Prima Official Digital Strategy Guide, pages 18 to 20; The Legend of Zelda: Twilight Princess, Nintendo Player's Guide, pages 36 to 38.
Ordon in wolf form
Ordona Province
- Midna returns Link to Ordon Spring, and the village is locked up for the night.
- Take the Ordon Shield from Jaggle's house and the Ordon Sword from Rusl's house, digging and climbing to get in.
- At Ordon Spring the spirit Ordona tells Link that the other light spirits have lost their light.
- Midna leads Link through the wall of twilight into Faron Woods.
Items:
 Ordon Shield
 Ordon Sword
The Legend of Zelda: Twilight Princess HD, Prima Official Digital Strategy Guide, page 21; The Legend of Zelda: Twilight Princess, Nintendo Player's Guide, pages 39 to 40.
Faron twilight
Faron Province
- Clear the Twilit Messengers blocking the path north and continue to Faron Spring.
- The spirit of the spring hands over the Vessel of Light, which has to be filled with tears from the Twilit Parasites.
- Pounce on the parasites on the path past the Twilit Baba, in Coro's hut, in the mist-covered low ground, inside the large hollow tree, and on the rock wall.
- Reach the last pair by following the treetop jumps and chasing the parasites that burrow through the ground.
- With the Vessel full, the light returns to the woods and Link takes human form again with the Hero's Clothes.
 Vessel of Light
 Hero's Clothes
The Legend of Zelda: Twilight Princess HD, Prima Official Digital Strategy Guide, pages 22 to 24; The Legend of Zelda: Twilight Princess, Nintendo Player's Guide, pages 41 to 43.
Forest Temple
Faron Province
- Enter through the cobweb into the first chamber, free the caged monkey with a spin attack, and climb the vines to the round door.
- Light the four torch stands in the crossroads hub to raise steps to the north door, and take the Dungeon Map from the chest beside them.
- A white baboon named Ook cuts the rope bridge in the wind gorge, and Link takes the Gale Boomerang from him after knocking him off his totem pole.
- Use the boomerang to spin the wind fans, cut the web that holds the hub chest for the Compass, and burn the Skulltula webs in the cavern.
- Ooccoo sits in a pot in one room, and she can take Link out of the temple and bring him back to that spot.
- Free all of the monkeys, then take the Big Key to the locked door in the forest tree chasm.
Items:
 Gale Boomerang
 Ooccoo
The Legend of Zelda: Twilight Princess HD, Prima Official Digital Strategy Guide, pages 25 to 32; The Legend of Zelda: Twilight Princess, Nintendo Player's Guide, pages 44 to 47.
Diababa
Forest Temple
- Two serpent heads rise from the pool, and the Gale Boomerang carries a Bombling from the logs into each open mouth.
- The Parasite then surfaces between the serpents, and Link dodges their lunges by rolling away from the open mouths.
- Ook swings in on a rope carrying a Bombling, which can be used on the serpents again.
- Target Ook and the Parasite's mouth together, and launch the boomerang as Ook swings across the room.
- Once the Parasite drops, strike the eye-like growth, roll clear of the ooze it sprays, and repeat for the second round.
Items:
 Heart Container
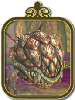
Boss: Twilit Parasite Diababa
Throw the Gale Boomerang at the Parasite's mouth in the moment Ook swings across the room, then cut the exposed eye.
The Legend of Zelda: Twilight Princess HD, Prima Official Digital Strategy Guide, page 33; The Legend of Zelda: Twilight Princess, Nintendo Player's Guide, page 48.
Hyrule Field and Kakariko Gorge
Faron and Eldin Provinces
- Midna warps Link out of the temple to Faron Spring, and the spirit says the next twilight is in the land of the Eldin spirit.
- Leave Faron Woods by the long grass path north and cross the southern field, avoiding or beating the Bokoblins and Kargaroks.
- Follow the eastern path to the black barrier, and Midna pushes Link through into the twilight as a wolf.
- The bridge over Kakariko Gorge is missing, so warp to North Faron Woods, have Midna carry the bridge leaning on the rock wall, and warp back to the gorge.
- Cross the bridge and follow the path east between the high rock walls to Kakariko Village.
The Legend of Zelda: Twilight Princess HD, Prima Official Digital Strategy Guide, pages 34 to 36; The Legend of Zelda: Twilight Princess, Nintendo Player's Guide, pages 50 to 53.
Kakariko Village twilight
Eldin Province
- Kakariko Village is in twilight, so search it for Twilit Parasites with the wolf's senses and use Midna to jump onto ledges.
- Head up Death Mountain Trail for more parasites.
- The last parasites are at the base of Death Mountain and on its lower slope.
- Take the full Vessel of Light to the Eldin Spring, where the spirit of Eldin restores Link to human form.
Items:
The Legend of Zelda: Twilight Princess HD, Prima Official Digital Strategy Guide, pages 36 to 39; The Legend of Zelda: Twilight Princess, Nintendo Player's Guide, pages 52 to 54.
Iron Boots from Ordon
Ordona Province
- Back in human form, Link calms Epona, who charges into Kakariko Village with Bulblins on her back. Hold on until she settles.
- The Gorons on Death Mountain Trail throw Link back down the slope. Renado says Mayor Bo of Ordon knows the Gorons' wrestling.
- Ride south through Kakariko Gorge and Hyrule Field to Ordon, fighting Bulblins from the saddle on the way.
- Mayor Bo wrestles Link at his house and gives him the Iron Boots, which keep him on his feet against the Gorons.
- Malo's new store in Kakariko sells the Hylian Shield for 200 Rupees.
Items:
 Iron Boots
 Hylian Shield
The Legend of Zelda: Twilight Princess HD, Prima Official Digital Strategy Guide, pages 40 to 43; The Legend of Zelda: Twilight Princess, Nintendo Player's Guide, pages 55 to 56.
Death Mountain and Gor Coron
Eldin Province
- Ride to the trail entrance and put on the Iron Boots so rolling Gorons cannot knock Link back.
- Once a Goron stops against the boots, the others offer to throw Link up the ledges.
- Gor Coron waits at the top in his sumo ring, and Link beats him in the Iron Boots to earn the Gorons' trust.
- Gor Coron lets Link into the Goron Mines.
The Legend of Zelda: Twilight Princess HD, Prima Official Digital Strategy Guide, page 44; The Legend of Zelda: Twilight Princess, Nintendo Player's Guide, pages 56 to 58.
Goron Mines
Eldin Province
- Wear the Iron Boots on the floor switches in the first chamber to turn off the fire jets, then smash the doorway blockage and continue to the Volcano Forge for the first Small Key.
- Sink to the bottom of the magnetic pool in the Iron Boots, walk the magnetic walls to the shrine, and talk to Gor Amato for the first Key Shard.
- Cross the rotating platforms in the Mine Reservoir, and Gor Ebizo's shrine gives the second Key Shard.
- Beat the giant Goron Dangoro in his arena by throwing him into the lava, and take the Hero's Bow from the chest beyond.
- Gor Liggs gives the third Key Shard and joins the three into the Big Key, and the Beamos Star Chamber holds the Compass.
 Hero's Bow
 Key Shard
The Legend of Zelda: Twilight Princess HD, Prima Official Digital Strategy Guide, pages 45 to 52; The Legend of Zelda: Twilight Princess, Nintendo Player's Guide, pages 57 to 62.
Fyrus
Goron Mines
- Cross the Grand Volcanic Passage, defeat the Bulblins, and open the giant door with the Big Key.
- Shoot the bright gem on Fyrus's helmet with the Hero's Bow to stun him.
- Put on the Iron Boots, grab the chain trailing from his feet, and pull until he falls over.
- Take the boots off and slash the gem while he lies down, and repeat for three rounds.
Items:
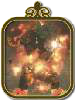
Boss: Twilit Igniter Fyrus
Shoot the gem on his helmet, pull the chain in the Iron Boots until he topples, then slash the gem for three rounds.
The Legend of Zelda: Twilight Princess HD, Prima Official Digital Strategy Guide, page 53; The Legend of Zelda: Twilight Princess, Nintendo Player's Guide, pages 62 to 63.
Lanayru to Snowpeak
The last Fused Shadow, the Master Sword, and the first Mirror Shards.
King Bulblin and the Bridge of Eldin
Eldin Province, Hyrule Field
- Back in Kakariko Village, King Bulblin's riders carry off Colin. Chase them on Epona and knock the riders from their boars.
- King Bulblin waits on the Bridge of Eldin. Ride at him and slash him as Epona passes until he falls into the gorge and Colin is safe.
- Ride Epona north to the wall of twilight over Lanayru, where Midna pulls Link in as a wolf.
- Ilia's purse lies inside. Sniffing it teaches Link her scent, which leads across north Hyrule Field to Castle Town.
- In Telma's Bar, Ilia and the sick Zora prince Ralis are in the back room with Telma.
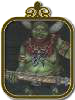
Boss: King Bulblin
Keep to his side, stay out of the way of the head-on charge, and slash as Epona passes.
The Legend of Zelda: Twilight Princess HD, Prima Official Digital Strategy Guide, pages 54, 57 to 59; The Legend of Zelda: Twilight Princess, Nintendo Player's Guide, pages 64 to 65.
Lake Hylia bridge and Zora's River
Lanayru Province
- Twilit Bulblins trap Link on the Great Bridge of Hylia with walls of fire, and the way out is a jump into Lake Hylia.
- Lake Hylia has nearly dried up, and the Zoras here are spirits.
- Defeat the Twilit Bulblin Archer and the Twilit Carrier Kargarok, then ride the Kargarok through the gorge to Zora's River.
- Zora's Domain is frozen over, with its people locked in the ice.
- Warp to Death Mountain, have Midna pick up a molten rock from the slope, and drop it on the frozen domain to melt the ice. Queen Rutela's spirit asks Link to save her son Ralis.
- Back at Lake Hylia, now full again, Lanayru gives Link the Vessel of Light.
Items:
The Legend of Zelda: Twilight Princess HD, Prima Official Digital Strategy Guide, pages 59 to 60; The Legend of Zelda: Twilight Princess, Nintendo Player's Guide, pages 66 to 67.
Lanayru twilight
Lanayru Province
- Sixteen Twilit Parasites carry the Tears of Light. Defeat them as the wolf and the tears go into the Vessel of Light.
- They hide around Lake Hylia, along Zora's River, in Zora's Domain, and in the streets of Castle Town.
- With the Vessel full, Lanayru restores the light and Link takes human form again.
- Lanayru shows Midna and Link a vision of how the Fused Shadows came to be.
The Legend of Zelda: Twilight Princess HD, Prima Official Digital Strategy Guide, pages 61 to 62, 64; The Legend of Zelda: Twilight Princess, Nintendo Player's Guide, pages 67 to 68.
Telma's wagon and the Zora Armor
Hyrule Field, Kakariko Village
- Telma, Ilia, and Ralis need an escort from Castle Town to Kakariko Village. Link rides Epona alongside the wagon.
- King Bulblin waits on a bridge along the route. Shoot him with arrows from Epona's back.
- Douse the wagon's fires with the Gale Boomerang, shoot the bombs dropped by Kargaroks, and clear the Bullbo riders.
- In Kakariko Village, Renado takes in Ilia and Ralis.
- Rutela's spirit leads Link to the Zora grave in the graveyard, where he receives the Zora Armor, and Midna says the next stop is the lakebed.
- Barnes in Kakariko sells Water Bombs, which the Lakebed Temple needs.
Items:
 Zora Armor
The Legend of Zelda: Twilight Princess HD, Prima Official Digital Strategy Guide, pages 65 to 71; The Legend of Zelda: Twilight Princess, Nintendo Player's Guide, pages 66, 69.
Lakebed Temple
Lanayru Province, Lake Hylia
- Wear the Zora Armor and take Water Bombs. Sink to the bottom of the lake in the Iron Boots and swim into the temple through the tunnel.
- Knock down stalactites with arrows to plug the water spouts or make stepping stones.
- The central Lakebed Column Hub holds the staircase that gold handles rotate. Ooccoo waits near the first locked door.
- The Clawshot comes from the chest after the Deku Toad fight, and it reaches the targets, vine walls, and grates in the rest of the temple.
- Pull the gold handles in the two reservoir towers to open floodgates, which turn the cogs and bring water to the rest of the dungeon.
- The Big Key lies in an underwater grotto and maze reached with the Clawshot and the Iron Boots, and its door is at the pillar in the hub.
 Clawshot
 Water Bombs
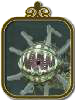
Boss: Twilit Aquatic Morpheel
Shoot the Clawshot at the eye that runs inside the tendrils, slash it as it bounces, spin away from the Bombfish, then Clawshot to the eye on the swimming body.
The Legend of Zelda: Twilight Princess HD, Prima Official Digital Strategy Guide, pages 72 to 80; The Legend of Zelda: Twilight Princess, Nintendo Player's Guide, pages 70 to 76.
Castle Town and Hyrule Castle
Central Hyrule
- Zant's curse traps Link as a wolf and leaves Midna weak. Zelda is the one who can help, so run to Castle Town and get into Telma's Bar.
- Auru, Shad, and Ashei meet in the back room. A way behind the crates leads down to the waterways.
- Cross the sewer pool and burn the spider webs with a stick torch to enter the castle labyrinth.
- Climb the Bulblin tower, cross the battlements and roof, and reach Zelda's tower. She heals Midna and sends Link to the Sacred Grove for the Master Sword.
The Legend of Zelda: Twilight Princess HD, Prima Official Digital Strategy Guide, pages 81 to 84; The Legend of Zelda: Twilight Princess, Nintendo Player's Guide, pages 77 to 81.
Sacred Grove and the Master Sword
Faron Woods
- Warp to north Faron Woods and save the monkey from the Puppets, and she shows the way into the woods.
- In the Sacred Grove, chase the Skull Kid through the woods, following his lantern and clearing his puppets.
- Two guardian statues block the way and copy Link's moves. Move in this order to put them on their marks: right, down, left, left, up, right, up, up, right, down, down, left, up.
- Link draws the Master Sword, which breaks Zant's curse. From then on Midna can change him between wolf and human at will.
Items:
 Master Sword
The Legend of Zelda: Twilight Princess HD, Prima Official Digital Strategy Guide, pages 85 to 88; The Legend of Zelda: Twilight Princess, Nintendo Player's Guide, pages 80 to 81.
Gerudo Desert
Gerudo Desert
- Auru at Lake Hylia gives Link Auru's Memo. Show it to Fyer, whose cannon fires Link into the Gerudo Desert.
- Moldorms and Peahats roam the dunes, and the southwest plateau holds a warp portal.
- A stone bridge piece stands in the desert, and Midna warps it to the Bridge of Eldin to close the gap.
- In the Bulblin camp in the north, ride a Bullbo through the towers and barricades to reach the entrance to the Arbiter's Grounds.
Items:
 Auru's Memo
The Legend of Zelda: Twilight Princess HD, Prima Official Digital Strategy Guide, pages 88 to 91; The Legend of Zelda: Twilight Princess, Nintendo Player's Guide, pages 82 to 83.
Arbiter's Grounds
Gerudo Desert
- Bring the Lantern and spare oil. Sand, Stalkins, and Poison Mites fill the early rooms.
- Four Poes stole the flames in the Grand Ceremonial Hallway. Beat each one as the wolf to light the torches and open the north door. The Circular Rotation Chamber turns when the lever is pushed counter-clockwise.
- Pull the chains in the chandelier rooms, beat the Redeads and Stalfos, and light the torches in the snake statue room.
- The mid-boss is Death Sword: sense it as a wolf, shoot it with the bow, then slash it. The chest after it holds the Spinner.
- Spinner's Paradise holds the Big Key. Back in the round groove room, ride the Spinner into the slots and spin it to turn the room and raise the floors, leading to the boss door.
Items:
 Spinner
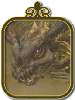
Boss: Twilit Fossil Stallord
Ride the Spinner on the outer groove past spiked Spinners, hit its spine three times, then slot the Spinner in the center groove, ride up, and strike the jaw.
The Legend of Zelda: Twilight Princess HD, Prima Official Digital Strategy Guide, pages 91 to 99; The Legend of Zelda: Twilight Princess, Nintendo Player's Guide, pages 84 to 91.
Mirror Chamber
Gerudo Desert
- Leave the Arbiter's Grounds by the stairs past the boss room to the Mirror Chamber.
- Ride the Spinner up the central pillar's grooves to raise the Mirror of Twilight.
- The Sages appear and explain Ganondorf and Zant. Midna must find the remaining mirror pieces, and one is in the snowy mountain.
The Legend of Zelda: Twilight Princess HD, Prima Official Digital Strategy Guide, pages 100 to 101; The Legend of Zelda: Twilight Princess, Nintendo Player's Guide, page 92.
Snowpeak approach
Snowpeak Province
- Ashei of the resistance waits at the foot of Snowpeak, reached from the top of Zora's Domain. She gives Link Ashei's Sketch of a fish.
- Show the sketch to Prince Ralis at the Zora grave in Kakariko's graveyard, and he gives Link the Coral Earring, a fishing lure.
- Use the Coral Earring with the Fishing Rod at Zora's Domain to catch a Reekfish, and learn its scent as the wolf.
- Follow the scent up Snowpeak through the blizzard, fighting White Wolfos, to the summit, where Yeto waits.
- Slide down on a leaf, as Yeto shows, to the Snowpeak Ruins entrance.
 Ashei's Sketch
 Coral Earring
The Legend of Zelda: Twilight Princess HD, Prima Official Digital Strategy Guide, pages 102 to 104; The Legend of Zelda: Twilight Princess, Nintendo Player's Guide, pages 93 to 95.
Snowpeak Ruins
Snowpeak Province
- Yeta and Yeto run the mansion; Ooccoo sits in the kitchen pantry, and crates in the Cold Storage room give puzzles.
- Fight White Wolfos in the courtyard and Mini Freezards and Chilfos inside. One chest holds the Ordon Pumpkin and another the Ordon Cheese, which Yeto adds to the soup.
- A cannon and cannonball puzzle in the armory gives the Compass, and the courtyard snow chest holds a Small Key.
- Darkhammer guards the jail chamber and yields the Ball and Chain. Chilfos Chapel's six Chilfos hold the Bedroom Key.
- Use the key on Yeta's bedroom door for the boss.
 Ball and Chain
 Ordon Pumpkin
 Ordon Cheese
 Bedroom Key
Boss: Twilit Ice Mass Blizzeta
Smash the ice doll in pieces with the sword, then bat Mini Freezards and the circling shards with the Ball and Chain.
The Legend of Zelda: Twilight Princess HD, Prima Official Digital Strategy Guide, pages 105 to 113; The Legend of Zelda: Twilight Princess, Nintendo Player's Guide, pages 96 to 101.
The Mirror of Twilight to Ganondorf
The last Mirror Shards, the Twilight Realm, and Hyrule Castle.
Sacred Grove revisited
Faron Province
- Warp to North Faron Woods as Link and walk north to Rusl, who hands over a golden Cucco for crossing the gorge.
- Glide with the Cucco across the gaps, and use the Gale Boomerang on the rotating bridge to turn it into a path before picking the bird up again.
- The Skull Kid and his skeletons return, and this time Link fights as a human. Follow the lantern light, hit the Skull Kid with arrows or the sword, then clear the skeletons in the arena for three more rounds of shooting him.
- Push the large block, drop down, and go north to the Master Sword pedestal. Strike the sword into it to make the guardian statue in front of the Temple of Time vanish.
- Five shadow beings drop in on the way to the entrance. Fight them as Link or as the wolf, and finish the last two with one blow.
- Inside the past Temple of Time, run north to the slit in the floor and plant the sword to raise a glowing staircase to the temple.
The Legend of Zelda: Twilight Princess HD, Prima Official Digital Strategy Guide, pages 116 to 119; The Legend of Zelda: Twilight Princess, Nintendo Player's Guide, pages 102 to 103.
Temple of Time
Sacred Grove
- The foyer statue is missing from one side of the door. Take the small horned statuette from the pedestal and set it on the empty pedestal to open the stairs, then light the two torches with the Lantern for a Small Key.
- Armos statues have a jewel on their backs. Walk around behind each one and shoot or slash the jewel, which gives the Dungeon Map from the first and a Small Key when the pair on the fifth floor are cleared.
- Several rooms need statuettes placed on floor switches or on the arms of scales. Weigh down the scale platforms to even them out, and keep a clear path to the white tile platforms before the last statuette goes down. Shoot the diamond switches with arrows from the marked circles to slide the barriers and reach the Compass.
- The Darknut room holds the Dominion Rod. Leap back from his sword, strike while he recovers to strip the armor, then roll behind him once he drops it, since he moves faster without it.
- With the Dominion Rod, wake the statue on the ledge and steer it to the bell disc to move it to the next room. The statue smashes golden gates and spiked machines, ignores electric fields, and can be carried over gaps on platforms that statuettes hold down.
- In the Helmasaurs room, pull armor pieces off with the Clawshot, place statuettes on three switches, and press the fourth with a piece of armor to reach the Big Key chest. Return the statue to the foyer door to open the way to the boss room, and take the fairy from the pot beforehand.
Items:
 Dominion Rod
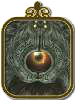
Boss: Twilit Arachnid Armogohma
Dodge the laser, shoot the eye on her back when it opens to drop her, run to the nearest statue and smash her with it using the Dominion Rod, repeat three times, then shoot the leftover eyeball.
The Legend of Zelda: Twilight Princess HD, Prima Official Digital Strategy Guide, pages 120 to 128; The Legend of Zelda: Twilight Princess, Nintendo Player's Guide, pages 104 to 110.
Ilia's memory and the Ancient Sky Book
Hyrule
- Renado's letter arrives after the Temple of Time. Take it to Telma at the bar and trade it for the doctor's invoice.
- Deliver the invoice to the doctor in Castle Town, push the box in his office to find the stain, and learn the medicine scent as the wolf. The scent leads to Telma's cat, who says Stalhounds south of the town took the Wooden Statue.
- Fight the Stalhounds in the field south of Castle Town at night to get the Wooden Statue, then show it to Ilia in Kakariko Village. The Gorons recognize it, and Darbus opens the Hidden Village entrance north of the Bridge of Eldin.
- Defeat all 20 Bulblin archers in the Hidden Village, using Hawkeye with the bow from outside the buildings. Impaz then comes out and gives Link Ilia's Charm.
- Give the charm to Ilia, who recovers her memory and gives Link the Horse Call. Show the Dominion Rod to Impaz to receive the Ancient Sky Book.
- Take the book to Shad in Renado's basement. He restores the power of the Dominion Rod and marks the owl statue locations on the map. Near Castle Town's north exit, the spirit of a warrior teaches the Great Spin.
 Invoice
 Wooden Statue
 Ilia's Charm
 Horse Call
 Ancient Sky Book
The Legend of Zelda: Twilight Princess HD, Prima Official Digital Strategy Guide, pages 129 to 131; The Legend of Zelda: Twilight Princess, Nintendo Player's Guide, pages 113 to 114.
Owl statues and the sky cannon
Hyrule Field
- Find the six owl statues with the Dominion Rod and stand on the glowing symbol beside each one. They are in South Faron, Kakariko Gorge, the Bridge of Eldin, western Hyrule Field, near the Great Hylian Bridge, and in Gerudo Desert.
- Several statues need to be moved to act as steps. At the Castle Town amphitheater, the Gerudo Desert rocks, and the Great Hylian Bridge vines, drop the statue below the ledge and hop from it to the symbol.
- Once all the symbols are known, return to Kakariko Village. Shad reads the word, and the Dominion Rod can then move the statue blocking the ancient cannon.
- Wait until Shad leaves the room, then have Midna warp the cannon to Lake Hylia.
- Fyer, at his pagoda by the lake, offers to repair the cannon for 300 Rupees. Pay him, then Clawshot into the cannon to be fired up to the City in the Sky.
The Legend of Zelda: Twilight Princess HD, Prima Official Digital Strategy Guide, pages 132 to 134; The Legend of Zelda: Twilight Princess, Nintendo Player's Guide, page 114.
City in the Sky
Lanayru Province
- The Oocca run a shop by the entrance. Keep the Iron Boots handy, since gusts blow across the gaps in the walls.
- Pick up an Oocca to float across gaps like a Cucco. Use the Spinner in wall slots to extend bridges and the Clawshot on ivy, grates, and ceiling ornaments to reach doors and switch off wind barriers.
- A dragon destroys the bridge in the central room. Climb the ivy columns back to the middle, and keep working through the east and west wings for the Small Key, Dungeon Map, and Water Bombs.
- The tower mid-boss is a small dragon with a sword and shield. Pull its shield away with the Clawshot, then slash. Beating it yields the Double Clawshots.
- The Double Clawshots open the east wing's crumbling pillars, flying plants, and meshes. Switch the fans on and off with the Iron Boots and the ceiling ornaments to find the Compass and the Big Key.
- Two more small dragons wait in the north tower. After they fall, climb the panels to the Big Key door.
 Double Clawshots
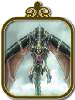
Boss: Twilit Dragon Argorok
Wear the Iron Boots against its wind, Clawshot its tail to pull it down and break its armor, then hop between the flying plants to hit the jewel on its back.
The Legend of Zelda: Twilight Princess HD, Prima Official Digital Strategy Guide, pages 135 to 143; The Legend of Zelda: Twilight Princess, Nintendo Player's Guide, pages 115 to 122.
Mirror Chamber
Gerudo Desert
- With the Double Clawshots, the chests that were out of reach on the overworld can now be reached, and the sky cannon returns Link to the ground.
- Warp to the Mirror Chamber in Gerudo Desert, where the shards join into the mirror.
- Climb the stairs to cross to the Twilight Realm and the Palace of Twilight.
The Legend of Zelda: Twilight Princess HD, Prima Official Digital Strategy Guide, pages 144 to 145, 148; The Legend of Zelda: Twilight Princess, Nintendo Player's Guide, page 124.
Palace of Twilight
Twilight Realm
- Head to the east wing door and clear the Zant heads that phase in and out. Deflect their shots with the shield attack to stun them for a Small Key.
- Black fog turns Link into a wolf. Hunt the Zant head inside it with the senses to open the chests with the Compass and the Dungeon Map.
- Zant's ghost seals each room and calls enemies in waves. After the first fight, hit the hand statue to drop a Sol and carry it to a floor groove. A stone hand chases the Sol, so run up the stairs and Clawshot it back before the hand takes it.
- Carry the Sol out of the palace to lift the curse from a Twili, and place it in a slot to raise a platform to the west wing. Repeat for the second Sol in the west wing, where glowing platforms and dark globes carry Link across the fog.
- Giving the second Sol lights the Master Sword. Its spin attacks now clear fog, so use them to reach the south tower, the Battlements for the Big Key, and the north tower with its light platforms.
- The Big Key opens the throne room door. Collect the Small Keys on the way from the Zant heads in the east section of the third floor.
Items:
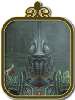
Boss: Usurper King Zant
The fight moves through earlier boss arenas, each needing a different tool, and ends with a sword duel where Zant's spin leaves him dizzy and open.
The Legend of Zelda: Twilight Princess HD, Prima Official Digital Strategy Guide, pages 149 to 157; The Legend of Zelda: Twilight Princess, Nintendo Player's Guide, pages 125 to 132.
Hyrule Castle
Hyrule Castle
- Midna removes the barrier around the castle. Push the gate open and clear the Bokoblin waves in the courtyards.
- Turn the east courtyard fans with the Gale Boomerang, then cross the graveyard, where the Stalfos, a rock bomb under the tree, and the Dominion Rod statues lead to a Small Key chest.
- King Bulblin guards the second Small Key in the western grounds. Dodge his axe and hit his back.
- Inside, fight the first Bokoblin and Lizalfos wave, and Clawshot the chandeliers to reach the Compass chest. Darknuts and Dynalfos wait in the corridors, and the Battlements hold a Small Key and the Big Key.
- Climb the collapsing staircases with the wolf's spirit guides, the Double Clawshots, and the Spinner. A Darknut stands before the final door.
- Save before using the Big Key door. A treasure room holds supplies, and the tower stairs lead to the last battles.
Boss: King Bulblin
Back away when he lifts the axe, roll behind him, and hit his back several times.
The Legend of Zelda: Twilight Princess HD, Prima Official Digital Strategy Guide, pages 158 to 164; The Legend of Zelda: Twilight Princess, Nintendo Player's Guide, pages 134 to 139.
Ganon and Ganondorf
Hyrule Castle
- Possessed Zelda hovers and summons triangular energy fields and energy balls. Flip clear of the fields and swing at the ball with a single timed slash to send it back at her.
- Ganon takes the form of Dark Beast Ganon. Dodge his charge, watch the portals, and when a blue one opens, shoot an arrow at his forehead, then slash the belly scar while he slides.
- Once the arrows stop working, become the wolf, grab him when the prompt appears, and throw him, then attack the belly scar.
- On horseback, ride behind Ganondorf and keep a straight line so Zelda can land a Light Arrow, then close in and strike. Ride around the Phantom Riders. Repeat until Ganondorf falls from his horse.
- The last fight is a sword duel in a walled arena. Keep a medium distance, press A on the chance prompt to lock swords, and win the struggle to land slashes and a spin attack.
- After three exchanges, press A on the finish prompt to deliver the Ending Blow.
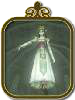
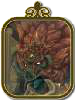
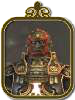
Boss: Ganon's Puppet Zelda, Dark Beast Ganon, Dark Lord Ganondorf
Stay about a sword's length away, circle him clockwise while targeting, and hit A at the chance prompt to enter the sword struggle that lets you chain slashes.
The Legend of Zelda: Twilight Princess HD, Prima Official Digital Strategy Guide, page 165; The Legend of Zelda: Twilight Princess, Nintendo Player's Guide, pages 139 to 143.