Twilight Princess enemies and bosses
For The Legend of Zelda: Twilight Princess on the GameCube.
The monsters of Hyrule, grouped by where Link first meets them, then the bosses. The game names only its bosses, on the title card at the start of each fight; the other names are the ones the official 2016 guide gives.
Portraits and facts from The Legend of Zelda: Twilight Princess HD, Prima Official Digital Strategy Guide, Enemies and Big Battles chapters.
Ordon and Faron
Bokoblin
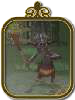
Swings a club in a heavy bash. Lock on and answer with a four-hit combo, or a spin when several come at once.
Deku Baba
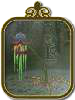
A meat-eating weed rooted to one spot, so it can only lunge as far as its stalk reaches. Two well-timed cuts or a spin finish it, and its head holds Deku Nuts for the Slingshot.
Hylian Hornet
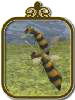
Hornets leave Link alone unless their nest is disturbed, and there is no fighting them off. Run, and they give up after about five seconds, or jump into water.
Keese
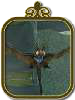
A bat that swoops at Link. Pick it off from a distance if you see it first; up close, lock on and cut, or jump and cut.
Rat
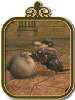
Little danger on its own. In dark places, listen for the squeaking, lock on, and cut.
Walltula
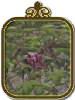
Clings to walls and bites anyone who climbs right next to it. One Slingshot shot from below knocks it off.
Forest Temple
Baba Serpent
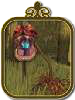
Its head cannot be hurt, so wait for it to rear up and cut or shoot the neck. The loose head keeps biting until it is hit again. A spin frees Link from its jaws.
Big Baba
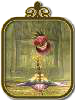
Walk up behind the shield, step aside when the head strikes, and cut or spin. With the head gone, throw a Bombling at the plant to blow it up.
Bombling
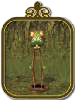
A struck Bombling curls up, flashes red, and blows up about seven seconds later. Harmless if left alone, and useful for clearing rocks or hurting tougher monsters.
Deku Like
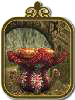
Nothing hurts it from outside. Drop a Bombling into its open mouth from above and let it swallow the blast.
Skulltula
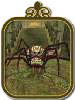
Its front is armoured. Block the leg strikes, step around to the side, and cut; once it falls over, finish it with a leaping stab.
Pygmy Skulltula
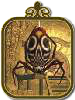
A small spider that hangs on a thread over gaps and drops just as Link jumps. Edge forward until it comes down, then shoot it with the Slingshot. Also found in Faron Woods.
Tile Worm
Hides under a floor tile and flings Link into the air. Walk around it at first; with the Gale Boomerang, hit its tile to pull it out, then cut.
Kakariko Village
Bulblin Riders
Each Bullbo carries two Bulblins, a rider and an archer. Spur Epona up beside them and one sword swing hits both, or ride in, spin, and ride away.
Guay
One crow is easy, a flock is not: they take turns diving from different sides. Block, then cut the bird as it pulls away, or shoot each one once Link has the Hero's Bow or Clawshot.
Goron Mines
Beamos
A statue that sprays fire from its eye. Before the Hero's Bow it cannot be hurt, so block and slip past; after, one arrow in the eye ends it.
Dodongo
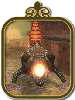
Breathes fire in a wide sweep and is armoured in front. Get round to its tail: three cuts there, or a spin through several tails at once.
Fire Keese
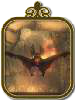
A burning Keese. Treat it like any other Keese: lock on and cut, or shoot it down.
Fire Toadpoli
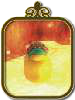
Spits fireballs that hurt and can knock Link off ladders. Bash the fireball back with the shield, a little early, and one hit beats it.
Tektite
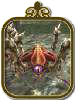
Red and blue Tektites have one move, a jump. Let them gather round, then spin as the first one lands to take out the lot.
Torch Slug
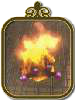
Harmless until Link gets close. Use a quick cut rather than a jump attack, which it can throw back. Some wait on cave ceilings and drop down, so shoot those from afar.
Water Toadpoli
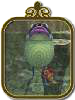
The water kind swims faster and spits too. Block and bounce the shot back, or beat it to the punch with an arrow.
Lanayru Province
Chu
Jelly blobs that come in several colours, each colour leaving jelly with a different healing effect. A few cuts pop one; scoop up what is left with an empty bottle.
Imp Poe
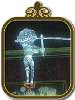
Invisible to Link's human eyes, so switch to the wolf's senses to see them. They swing a sickle; pounce to beat one and claim its Poe Soul.
Lakebed Temple
Bari
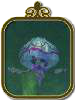
A floating jellyfish that shrugs off most attacks. Hit it with the Clawshot and see what happens.
Bombfish
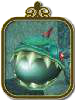
Blows itself up when threatened, hurting Link in the blast. Fight from dry land, or underwater with the Iron Boots on, using the Clawshot. A Bombfish led to a weak wall can blow it open.
Chu Worm
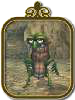
Its jelly bubble turns the sword but not a Bomb Arrow. Burst the bubble, then cut the worm. The Clawshot works too.
Helmasaur
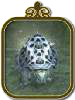
Armoured at the front and sides, and strong enough to push Link back through his shield. Get behind it and strike, with a spin or a back slice. The Clawshot works well on it too.
Lizalfos
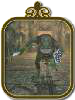
A lizard warrior with a sword and a bladed tail that knocks Link down, and good at blocking. Bomb Arrows work, or shield bash it, roll behind it, and cut its back. The skull-faced kind fights the same way.
Shell Blade
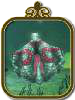
Its shell turns down vertical cuts, but the soft inside takes any sideways slash. The spin attack works best.
Skullfish
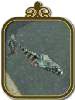
Bony fish that bite. From land, use the Gale Boomerang, Clawshot, or bombs; underwater, put on the Iron Boots and cut, or swim away. One caught on the Fishing Rod gives a heart before it goes back.
Toado
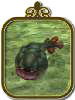
Weak alone and only a danger in numbers. Keep a wall at your back and clear them with spin attacks.
Hyrule Field
Bulblin
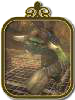
Club-carrying foot soldiers. Block the first swing, then three cuts and a spin; this beats several at once. Or bash one over with the shield and finish it on the ground.
Bomskit
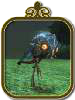
Leaves Link alone, but drops bombs when chased. Shoot it from range; its remains can be scooped up as worm bait for fishing.
Bubble
Flying skulls in three kinds: plain Bubbles bite, Fire Bubbles burn wooden shields, and Ice Bubbles freeze Link. Use arrows or Bomb Arrows from range, and skip finishing moves, which they tend to dodge.
Kargarok
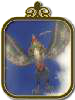
A big bird. Lock on and use a leaping cut to bring it down, then finish it; miss the finishing stab and it gets a free hit while the sword is stuck.
Leever
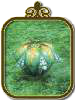
A ring of Leevers circles Link, then closes in. Stand still and spin just as they strike to beat them all, or shoot them, or run.
Moldorm
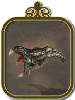
Burrows and pops up to snap at Link, too quick for the sword alone. Pull it out of the ground with the Clawshot, then cut.
Stalhound
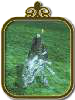
Skeleton hounds that dig up out of the ground, bite, and dig back down. Two spins or a couple of leaping cuts beat one, and they often drop Rupees.
Arbiter's Grounds
Ghoul Rat
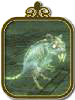
Ghost rats that do no harm themselves but cling to the wolf and slow him for other monsters. Use the wolf's senses to see them, spin to shake them off, and bite.
Poison Mite
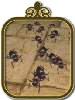
Do no harm themselves but slow Link in sinking sand. Get to solid ground before fighting, or raise the Lantern to scare them off.
Redead
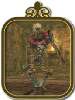
Freezes Link with a scream, then swings its sword. Shoot it with Bomb Arrows from range, or bite it as the wolf.
Stalfos
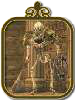
A skeleton that most attacks cannot hurt. Bomb Arrows or other blasts break it, as many times as it takes.
Stalkin
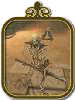
Small, slow, brittle skeletons that come in crowds. One spin clears a group.
Staltroop
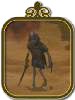
Skulls that rise from the sand in the fight with Stallord. They are obstacles more than attackers: keep moving, and ride the Spinner through them.
Sacred Grove
Puppet
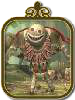
Skull Kid's wooden puppets, usually four or more at once. Each one only punches; the danger is the number. A spin breaks them in one go.
Snowpeak
Chilfos
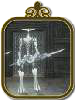
Throws a spear that knocks Link down. From far off, two quick Bomb Arrows; up close, cut until the spear snaps, then spin and keep slashing.
Freezard
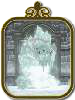
Stays put, but its breath freezes Link in place and drains his hearts. Hit it with the Ball and Chain, and back off from the breath. Watch for other monsters while frozen.
Ice Keese
A Keese wrapped in frost. Any attack beats it.
Mini Freezard
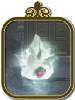
Their touch traps Link in ice. Cut, block, and cut again, one at a time. The Ball and Chain is best, though Link meets the first ones before he has it.
White Wolfos
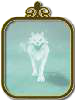
Quick snow wolves that stalk Link and attack in pairs. Block the first and cut the second, or run past, or take them on as the wolf.
Temple of Time
Armos
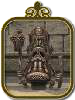
A statue that comes to life and cannot be hurt from the front. Roll round to the weak spot on its back. When it glows, get clear: it is about to blow up.
Baby Gohma
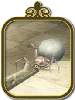
Runs away rather than attacks. Catch it with Bomb Arrows, the Clawshot, or a cut on the run.
Beamos (White)
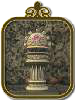
Fires a red beam that drains Link's hearts, and cannot be hurt until it wakes. Step back out of range and shoot the eye with a plain arrow.
Darknut
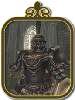
A slow knight in heavy armour with heavy blows. Backflip away from the swings and answer with jump attacks. Once it loses its armour it is faster and fiercer; stagger it with a back slice and follow with quick combos.
Dynalfos
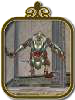
Only counters hurt it. Block its swing and answer at once with a spin or a helm splitter, or hit its tail from behind. Three or four good hits beat it.
Young Gohma
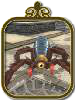
Leaps at Link with its pincers. Two sweeping cuts beat it.
City in the Sky
Aeralfos
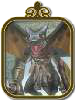
A winged lizard with sword and shield. When it raises the shield in the air, latch onto it with the Clawshot to pull it down, then attack. Don't Clawshot the shield while it stands on the ground.
Helmasaurus
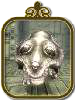
A big, boar-like beast with a helmet for a head that charges. Jump aside from the charge and hit its unguarded back.
Palace of Twilight
Zant Mask
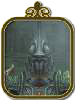
Giant floating heads like Zant's helmet that warp about and fire purple orbs. Bat the orbs back with a shield attack, and hit the masks hard whenever they appear.
Zant's Hand
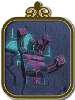
A huge hand that cannot be beaten. It does not attack Link but slowly follows the Sol he carries, and slams down to grab it, hurting him if he is under it. Take the Sol back with the Clawshot.
In twilight
Twilit Baba
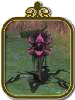
The twilight kind of Deku Baba, rooted to one spot the same way. Two bites or a spin.
Twilit Bulblin
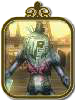
Fights like a Bulblin and falls to two hits. The wolf has no finishing move, so a downed one must be left to get up. Bite, spin, or use Midna's energy field.
Twilit Bulblin Archer
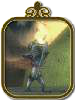
Shoots like a Bulblin archer and makes life hard for the wolf, so deal with these first. Dash in at an angle, jump and bite, wait for it to stand, and bite again.
Twilit Kargarok
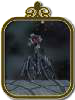
Each hit takes half a heart. Stay locked on, wait for it to dive, and leap to bite. Two bites beat it.
Twilit Keese
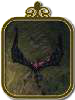
A longer, twilight Keese. One bite beats it, and a spin catches those flying close.
Twilit Messenger
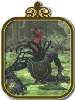
Worst in groups. Lock on and bite until thrown off, then finish with a spin.
Twilit Parasite
Sixteen of these twilight insects roam the land. Look for purple sparks and shadows on the ground; they hide in walls, floors, the ground, and out of reach. Lock on and pounce.
Twilit Vermin
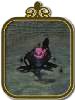
Very weak, one bite each, but merciless. The wolf cannot fight back while swimming, so get to dry land.
Dungeon bosses
The bosses with a title card, then the mid-bosses and other big fights. A boss inside a dungeon links to that dungeon's map.
Diababa
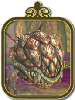
Twilit Parasite
The Forest Temple's boss, a plant gone wild that fights in two forms, beaten with help from a monster Link met earlier in the temple. It leaves a Heart Container and a Fused Shadow.
Fyrus
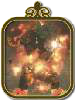
Twilit Igniter
The Goron Mines boss, a huge beast whose body is all fire. It takes quick feet, careful bow shots, and several rounds to put him down.
Morpheel
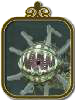
Twilit Aquatic
The Lakebed Temple boss, fought in two stages, both deadly, and the second deep under water. A test of aiming and swimming.
Stallord
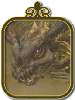
Twilit Fossil
The Arbiter's Grounds boss. Ride the Spinner round the arena, past the Staltroops and its purple poison, and slam into its back. When it seems beaten, it has one more trick.
Blizzeta
Twilit Ice Mass
The Snowpeak Ruins boss, who rules ice. Smash her shards and frozen helpers with the Ball and Chain before taking the fight to her.
Armogohma
Twilit Arachnid
The Temple of Time boss, a giant spider with fire beams and swarms of young. A steady bow hand and fast swordplay win a Mirror Shard and a Heart Container.
Argorok
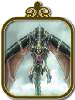
Twilit Dragon
The black dragon that took over the City in the Sky and scares the Oocca who live there. Well armoured and hard to follow, it is brought down with the Double Clawshot.
Zant
Usurper King
Zant troubles Link all through the journey, but they only fight in his throne room in the Palace of Twilight, where he changes tactics again and again.
Zelda
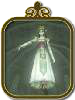
Ganon's Puppet
At Hyrule Castle, Ganondorf takes over Princess Zelda's body. Turn her light attacks back on her to drive him out.
Ganon
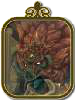
Dark Beast
A huge boar beast, the form of Ganondorf's power and rage. He warps about and strikes without warning, so follow his moves closely.
Ganondorf
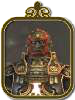
Dark Lord
The last battle, in two parts: a chase on horseback with Princess Zelda's arrows to slow him, then a sword duel to the end.
Mid-bosses and other big fights
Ook
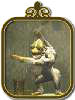
A baboon who loves to dance and holds the Gale Boomerang. Knock his perch to bring him down to Link's level; beating him wins the boomerang.
King Bulblin
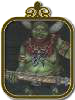
The Bulblin leader who first broke the peace of Ordon. Link meets him again and again across the game, and each fight brings a new trick.
Dangoro
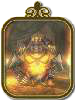
A huge Goron in the Goron Mines who tests the sword, sumo, and the Iron Boots, in no set order.
Twilit Carrier Kargarok
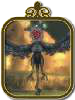
A giant twilight bird with an archer on its back, in Lanayru Province. Dodge the arrows, wait for an opening, and pounce.
Twilit Bloat
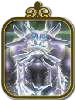
A swollen twilight insect in Lanayru Province, beaten only by biting, and the last one Link needs to fill the Vessel of Light.
Deku Toad
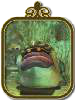
Sends its young after Link while it gets ready, then leaps; watch the sky. It tires fast and rests after each attack, and that is the time to strike.
Skull Kid
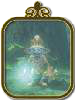
In Faron Woods and the Sacred Grove he sends Puppets after Link and pops from place to place. Watch for him, and strike quickly when he shows.
Death Sword
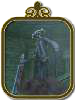
An undead swordsman in the Arbiter's Grounds that takes both forms to beat: the wolf's eyes and teeth, and Link's sword and bow.
Darkhammer
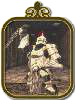
Swings a Ball and Chain. Roll or use the Clawshot to stay clear, and hit the tail it leaves open. A long fight, so wait for the right moment.
Darknut
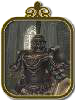
The Temple of Time's armoured knight. Rushing in gets Link hurt; with timing and rolling, it never lands a blow.
Aeralfos
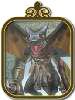
The first Aeralfos, halfway through the City in the Sky. Once its weakness is found it is easy to bring down, and it holds the Double Clawshot.
Phantom Zant
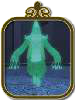
Zant's phantom, met twice in the Palace of Twilight. It does not fight but calls up twilight monsters; follow it and break off each summoning.