Digdogger
For The Legend of Zelda on the Nintendo Entertainment System (NES).
From the manual
A huge body. A shock wave makes it shrink.
Translated from the Japanese manual.
Enemy

| Kind | Boss |
|---|---|
| Japanese name | デグドガ |
Official art
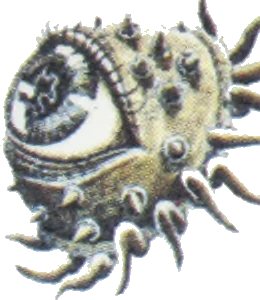
From the official guides
A big sea urchin. Because of its huge body, it shrinks when hit by a shock wave. Its attack is strong, though.
A big sea urchin. Because of its huge body, it shrinks when hit by a shock wave. Its attack is strong, though.
Big sea urchins. In spite of their big bodies, they shrivel up when attacked. But watch out! They come on pretty strong.
Giant sea urchins. If a Digdogger receives shock waves, its huge body shrinks. However, he has strong offensive power. Shock waves are Digdogger's weakness. You may be able to find out more about it from someone in the land of Hyrule.
Blow the Whistle when you face Digdogger and he will separate into three pieces which you can then finish off easily with your sword. When you have polished him off, a Heart Container will appear as your reward.
Normal attacks do nothing to this monster either. Hit this sea urchin monster with a certain shock wave and it quickly shrinks into something quite ordinary. What is the "certain shock wave"? That is a secret. Look for a treasure that fits.
It is a big sea urchin. Do something to it and it shrinks. Once it is small, that is your chance! But it also gets faster.
Its attack is strong, and no weapon, whether sword, bow and arrow, bombs, or boomerang, does it any harm. But it has one single weak point, and an old man underground gives you a hint. From that hint you have to find the answer yourself.
A big sea urchin. Its attack is strong, and its body shrinks when hit by a shock wave.
The boss of Level 5, a giant sea urchin. No attack works on its squishy body, but you can shrink it with a sound it hates. Now, what could that be?
A giant urchin that lives in the underground labyrinths. Its attacks are strong, but there is a way to shrink its body. The best strategy is to shrink it first and then finish it with your sword.
It circles all around the room. You can't beat it the normal way. Let it hear a certain sound and it shrinks and gets weaker.
A sea urchin monster with a big body. Because its body is so huge, it shrinks when hit by a shock wave. Its attack is quite strong, though.
A huge flabby sea urchin. This one also needs a special weapon. Hit it with a shock wave of the sound it hates, and finish it off when its body shrinks. Once it is small, you can stop it with the Boomerang.
A big sea urchin. Because its body is so huge, it shrinks when hit by a shock wave. Its attack is strong, though, so don't take it lightly.
Numbers
Hits to beat it
Hits don't wear it down.
Hearts lost per touch
| No ring |  Blue Ring |  Red Ring |
|---|---|---|
| 2 | 1 | 0.5 |
Where it appears
Labyrinths, First Quest
Labyrinths, Second Quest
Red: rooms it is in. Green: the entrance.